TensorFlow의 고급 기계 학습 API (tf.estimator)를 사용하면 다양한 기계 학습 모델을 쉽게 구성, 교육 및 평가할 수 있습니다. 이 튜토리얼에서는 tf.estimator를 사용하여 신경 네트워크 분류기를 만들고 Iris 데이터 세트
(Iris data set )에서이를 학습하여 sepal / petal geometry를 기반으로 꽃 종을 예측합니다. 다음 다섯 단계를 수행하는 코드를 작성합니다.
1.Iris 교육 / 테스트 데이터가 포함 된 CSV를 TensorFlow Dataset에로드하십시오.
2.신경 네트워크 분류 자 생성
3.교육 데이터를 사용하여 모델 교육
4.모델의 정확성 평가
5.새 샘플 분류
참고 :이 자습서를 시작하기 전에 TensorFlow를 컴퓨터에 설치해야합니다.
Complete Neural Network Source Code(완전한 신경 네트워크 소스 코드)
from __future__ import absolute_import
from __future__ import division
from __future__ import print_function

import os
import urllib

import numpy as np
import tensorflow as tf

# Data sets
IRIS_TRAINING = "iris_training.csv"
IRIS_TRAINING_URL = "http://download.tensorflow.org/data/iris_training.csv"

IRIS_TEST = "iris_test.csv"
IRIS_TEST_URL = "http://download.tensorflow.org/data/iris_test.csv"

def main():
  # If the training and test sets aren't stored locally, download them.
  if not os.path.exists(IRIS_TRAINING):
    raw = urllib.urlopen(IRIS_TRAINING_URL).read()
    with open(IRIS_TRAINING, "w") as f:
      f.write(raw)

  if not os.path.exists(IRIS_TEST):
    raw = urllib.urlopen(IRIS_TEST_URL).read()
    with open(IRIS_TEST, "w") as f:
      f.write(raw)

  # Load datasets.
  training_set = tf.contrib.learn.datasets.base.load_csv_with_header(
      filename=IRIS_TRAINING,
      target_dtype=np.int,
      features_dtype=np.float32)
  test_set = tf.contrib.learn.datasets.base.load_csv_with_header(
      filename=IRIS_TEST,
      target_dtype=np.int,
      features_dtype=np.float32)

  # Specify that all features have real-value data
  feature_columns = [tf.feature_column.numeric_column("x", shape=[4])]

  # Build 3 layer DNN with 10, 20, 10 units respectively.
  classifier = tf.estimator.DNNClassifier(feature_columns=feature_columns,
                                          hidden_units=[10, 20, 10],
                                          n_classes=3,
                                          model_dir="/tmp/iris_model")
  # Define the training inputs
  train_input_fn = tf.estimator.inputs.numpy_input_fn(
      x={"x": np.array(training_set.data)},
      y=np.array(training_set.target),
      num_epochs=None,
      shuffle=True)

  # Train model.
  classifier.train(input_fn=train_input_fn, steps=2000)

  # Define the test inputs
  test_input_fn = tf.estimator.inputs.numpy_input_fn(
      x={"x": np.array(test_set.data)},
      y=np.array(test_set.target),
      num_epochs=1,
      shuffle=False)

  # Evaluate accuracy.
  accuracy_score = classifier.evaluate(input_fn=test_input_fn)["accuracy"]

  print("\nTest Accuracy: {0:f}\n".format(accuracy_score))

  # Classify two new flower samples.
  new_samples = np.array(
      [[6.4, 3.2, 4.5, 1.5],
       [5.8, 3.1, 5.0, 1.7]], dtype=np.float32)
  predict_input_fn = tf.estimator.inputs.numpy_input_fn(
      x={"x": new_samples},
      num_epochs=1,
      shuffle=False)

  predictions = list(classifier.predict(input_fn=predict_input_fn))
  predicted_classes = [p["classes"] for p in predictions]

  print(
      "New Samples, Class Predictions:    {}\n"
      .format(predicted_classes))

if __name__ == "__main__":
    main()
다음 섹션에서는 코드를 자세히 설명합니다.
Load the Iris CSV data to TensorFlow / Iris CSV데이터를 TensorFlow에 로드.
Iris 데이터 세트에는 Iris setosa, Iris virginica 및 Iris versicolor와 같은 세 가지 관련된 Iris 종 각각에서 추출한 50 개의 샘플로 구성된 150 행의 데이터가 들어 있습니다.
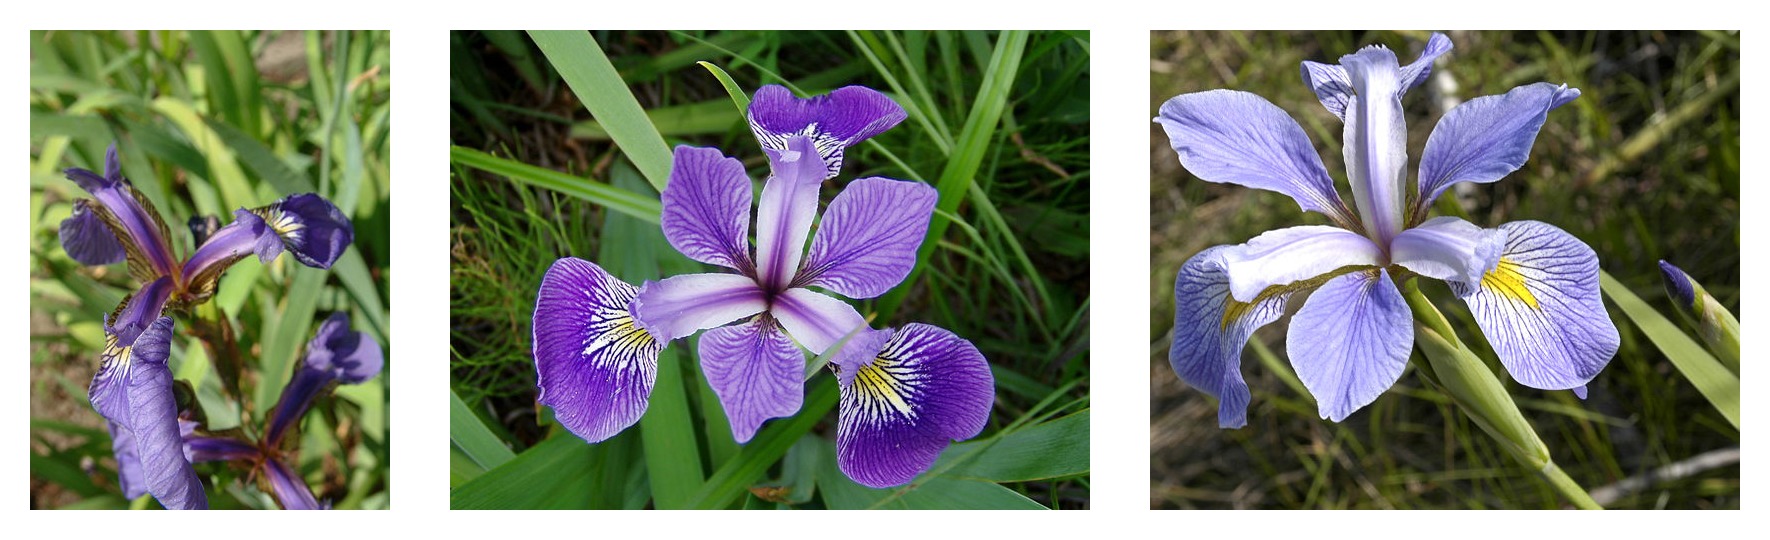
왼쪽에서 오른쪽으로 Iris setosa (Radomil, CC BY-SA 3.0), Iris versicolor (Dlanglois, CC BY-SA 3.0), Iris virginica (Frank Mayfield, CC BY-SA 2.0) 입니다.
각 행은 각 꽃 샘플에 대한 다음 데이터를 포함합니다 : 꽃잎 길이, 꽃잎 너비, 꽃잎 길이, 꽃잎 너비 및 꽃 종. 꽃 종은 정수로 표시되며, 0은 아이리스 세토 사, 1은 아이리스 versicolor, 2는 아이리스 virginica를 나타냅니다.
| Sepal Length | Sepal Width | Petal Length | Petal Width | Species |
|---|---|---|---|---|
| 5.1 | 3.5 | 1.4 | 0.2 | 0 |
| 4.9 | 3.0 | 1.4 | 0.2 | 0 |
| 4.7 | 3.2 | 1.3 | 0.2 | 0 |
| … | … | … | … | … |
| 7.0 | 3.2 | 4.7 | 1.4 | 1 |
| 6.4 | 3.2 | 4.5 | 1.5 | 1 |
| 6.9 | 3.1 | 4.9 | 1.5 | 1 |
| … | … | … | … | … |
| 6.5 | 3.0 | 5.2 | 2.0 | 2 |
| 6.2 | 3.4 | 5.4 | 2.3 | 2 |
| 5.9 | 3.0 | 5.1 | 1.8 | 2 |
이 자습서에서는 아이리스 (Iris) 데이터가 무작위로 분리되어 두 개의 별도 CSV로 나뉩니다.
- A training set of 120 samples (iris_training.csv)
- A test set of 30 samples (iris_test.csv).
시작하려면 먼저 필요한 모든 모듈을 가져오고 데이터 세트를 다운로드하고 저장할 위치를 정의하십시오.
from __future__ import absolute_import
from __future__ import division
from __future__ import print_function

import os
import urllib

import tensorflow as tf
import numpy as np

IRIS_TRAINING = "iris_training.csv"
IRIS_TRAINING_URL = "http://download.tensorflow.org/data/iris_training.csv"

IRIS_TEST = "iris_test.csv"
IRIS_TEST_URL = "http://download.tensorflow.org/data/iris_test.csv"
그런 다음 교육 및 테스트 세트가 로컬에 저장되어 있지 않으면 다운로드하십시오.
if not os.path.exists(IRIS_TRAINING):
  raw = urllib.urlopen(IRIS_TRAINING_URL).read()
  with open(IRIS_TRAINING,'w') as f:
    f.write(raw)

if not os.path.exists(IRIS_TEST):
  raw = urllib.urlopen(IRIS_TEST_URL).read()
  with open(IRIS_TEST,'w') as f:
    f.write(raw)
다음으로 learn.datasets.base의 load_csv_with_header () 메소드를 사용하여 교육 및 테스트 세트를 데이터 세트에로드하십시오. load_csv_with_header () 메소드는 세 가지 필수 인수를 취합니다.
filename 파일 경로를 CSV 파일로 가져옵니다.
target_dtype - 데이터 세트의 대상 값에 numpy 데이터 유형을 사용합니다.
features_dtype : 데이터 집합의 특징 값에 numpy 데이터 유형을 사용합니다.
여기에서 목표 (모델을 예측하기 위해 훈련하는 값)는 0-2의 정수로 꽃의 종류이므로 적절한 numpy 데이터 유형은 np.int입니다.
# Load datasets.
training_set = tf.contrib.learn.datasets.base.load_csv_with_header(
    filename=IRIS_TRAINING,
    target_dtype=np.int,
    features_dtype=np.float32)
test_set = tf.contrib.learn.datasets.base.load_csv_with_header(
    filename=IRIS_TEST,
    target_dtype=np.int,
    features_dtype=np.float32)
tf.contrib.learn의 데이터 세트는 튜플로 명명됩니다. 데이터 및 대상 필드를 통해 기능 데이터 및 대상 값에 액세스 할 수 있습니다. 여기서, training_set.data 및 training_set.target은 각각 학습 세트에 대한 피쳐 데이터 및 목표 값을 포함하고, test_set.data 및 test_set.target은 피쳐 데이터 및 테스트 세트에 대한 목표 값을 포함한다.
나중에 "DNNClassifier를 Iris 교육 데이터에 맞추기"에서 training_set.data 및 training_set.target을 사용하여 모델을 교육하고 "모델 정확성 평가"에서 test_set.data 및 test_set.target을 사용합니다. . 하지만 먼저 다음 섹션에서 모델을 구성 해 보겠습니다.
Construct a Deep Neural Network Classifier
tf.estimator는 Estimator라고하는 미리 정의 된 다양한 모델을 제공하며, "즉시"사용하여 데이터에 대한 교육 및 평가 작업을 실행할 수 있습니다. 여기서, 아이리스 (Iris) 데이터에 맞게 딥 뉴럴 네트워크 분류 자 모델을 구성 할 것입니다. tf.estimator를 사용하면 몇 줄의 코드로 tf.estimator.DNNClassifier를 인스턴스화 할 수 있습니다.
# Specify that all features have real-value data
feature_columns = [tf.feature_column.numeric_column("x", shape=[4])]

# Build 3 layer DNN with 10, 20, 10 units respectively.
classifier = tf.estimator.DNNClassifier(feature_columns=feature_columns,
                                        hidden_units=[10, 20, 10],
                                        n_classes=3,
                                        model_dir="/tmp/iris_model")
위의 코드는 데이터 집합의 지형지 물에 대한 데이터 형식을 지정하는 모델의 지형지 물 열을 먼저 정의합니다. 모든 기능 데이터는 연속적이므로 tf.feature_column.numeric_column은 기능 컬럼을 구성하는 데 사용할 수있는 적절한 함수입니다. 데이터 세트에는 세 가지 기능 (세퍼리 폭, 세팔 높이, 꽃잎 너비 및 꽃잎 높이)이 있으므로 모든 데이터를 저장하려면 모양을 [4]로 설정해야합니다.
그런 다음 코드는 다음 인수를 사용하여 DNNClassifier 모델을 만듭니다.
1. feature_columns = feature_columns. 위에 정의 된 기능 열 집합입니다.
2. hidden_units = [10, 20, 10]. 10, 20 및 10 개의 뉴런을 포함하는 3 개의 숨겨진 레이어입니다.
3. n_classes = 3. 3 개의 아이리스 종을 나타내는 3 개의 대상 클래스입니다.
4. model_dir = / tmp / iris_model. 모델 교육 중에 TensorFlow가 검사 점 데이터와 TensorBoard 요약을 저장할 디렉토리입니다.
Describe the training input pipeline
tf.estimator API는 모델의 데이터를 생성하는 TensorFlow 조작을 작성하는 입력 기능을 사용합니다. tf.estimator.inputs.numpy_input_fn을 사용하여 입력 파이프 라인을 생성 할 수 있습니다.
# Define the training inputs
train_input_fn = tf.estimator.inputs.numpy_input_fn(
    x={"x": np.array(training_set.data)},
    y=np.array(training_set.target),
    num_epochs=None,
    shuffle=True)
Fit the DNNClassifier to the Iris Training Data
이제 DNN 분류기 모델을 구성 했으므로 train 메서드를 사용하여 Iris 교육 데이터에 맞출 수 있습니다. train_input_fn을 input_fn으로 전달하고 훈련 단계 수를 입력하십시오 (here, 2000).
# Train model.
classifier.train(input_fn=train_input_fn, steps=2000)
모델의 상태는 분류 기준에 유지되므로 원하는 경우 반복적으로 학습 할 수 있습니다. 예를 들어, 위의 내용은 다음과 같습니다.
classifier.train(input_fn=train_input_fn, steps=1000)
classifier.train(input_fn=train_input_fn, steps=1000)
그러나 기차를 타는 동안 모델을 추적하려는 경우 TensorFlow SessionRunHook을 사용하여 로깅 작업을 수행하는 것이 좋습니다.
Evaluate Model Accuracy / 모델 정확도 평가
Iris 교육 데이터에서 DNNClassifier 모델을 교육했습니다. 이제 평가 방법을 사용하여 아이리스 테스트 데이터에서 정확성을 확인할 수 있습니다. train과 마찬가지로 evaluate은 입력 파이프 라인을 만드는 입력 함수를 사용합니다. evaluate은 평가 결과로 dicts를 반환합니다. 다음 코드는 Iris 테스트 data-test_set.data와 test_set.target을 전달하여 결과의 정확성을 평가하고 인쇄합니다.
# Define the test inputs
test_input_fn = tf.estimator.inputs.numpy_input_fn(
    x={"x": np.array(test_set.data)},
    y=np.array(test_set.target),
    num_epochs=1,
    shuffle=False)

# Evaluate accuracy.
accuracy_score = classifier.evaluate(input_fn=test_input_fn)["accuracy"]

print("\nTest Accuracy: {0:f}\n".format(accuracy_score))
참고 : numpy_input_fn에 대한 num_epochs = 1 인수가 중요합니다. test_input_fn은 데이터를 한 번 반복 한 다음 OutOfRangeError를 발생시킵니다. 이 오류는 분류 작업이 평가를 중단하도록 신호를 보내므로 입력을 한 번 평가합니다.
전체 스크립트를 실행하면 다음과 유사한 내용이 인쇄됩니다.
Test Accuracy: 0.966667정확도 결과는 약간 다를 수 있지만 90 % 이상이어야합니다. 상대적으로 작은 데이터 세트는 나쁘지 않습니다!
새 샘플 분류
견적 기의 predict () 메소드를 사용하여 새 견본을 분류하십시오. 예를 들어,이 두 가지 새로운 꽃 샘플이 있다고 가정 해보십시오.
| Sepal Length | Sepal Width | Petal Length | Petal Width |
|---|---|---|---|
| 6.4 | 3.2 | 4.5 | 1.5 |
| 5.8 | 3.1 | 5.0 | 1.7 |
predict () 메서드를 사용하여 해당 종을 예측할 수 있습니다. predict는 목록으로 쉽게 변환 될 수있는 dicts 생성자를 반환합니다. 다음 코드는 클래스 예측을 검색하고 인쇄합니다.
# Classify two new flower samples.
new_samples = np.array(
    [[6.4, 3.2, 4.5, 1.5],
     [5.8, 3.1, 5.0, 1.7]], dtype=np.float32)
predict_input_fn = tf.estimator.inputs.numpy_input_fn(
    x={"x": new_samples},
    num_epochs=1,
    shuffle=False)

predictions = list(classifier.predict(input_fn=predict_input_fn))
predicted_classes = [p["classes"] for p in predictions]

print(
    "New Samples, Class Predictions:    {}\n"
    .format(predicted_classes))
결과는 다음과 같습니다.
New Samples, Class Predictions: [1 2]따라서 모델은 첫 번째 샘플이 Iris versicolor이고 두 번째 샘플은 Iris virginica라고 예측합니다.
추가 리소스
tf.estimator를 사용하여 선형 모델을 만드는 방법에 대한 자세한 내용은 TensorFlow를 사용하는 대규모 선형 모델을 참조하십시오.
tf.estimator API를 사용하여 사용자의 Estimator를 빌드하려면 tf.estimator에서 Estimator 만들기를 확인하십시오.
브라우저에서 신경망 모델링 및 시각화를 실험하려면 Deep Playground를 확인하십시오.
신경 네트워크에 대한 고급 자습서는 길쌈 신경 네트워크 및 순환 신경 네트워크를 참조하십시오.
++++++
csv 파일을 원하는 데이터를 입력하면 간단히 판단하는 프로그램 및 그래프를 얻을 수 있습니다.
일정한 데이터를 가지고 판별하는 그래프 및 수식을 만들지 않고 원하는 것을 만들 수 있습니다.
글보다는 csv파일을 원하는 것으로 직접 수정하셔서 활용해보시면 더 빠른 이해를 하실 수 있습니다.
'Computer_IT > tensorflow' 카테고리의 다른 글
| [텐서플로우]인공지능 들여다보기(그래프 보기)Tensorboard) (0) | 2017.12.08 |
|---|---|
| tf.estimator로 입력 함수 작성하기 (0) | 2017.11.24 |
| TensorFlow Mechanics 101 (0) | 2017.08.24 |
| Deep MNIST for Experts ( 히든 레이어 버전) (0) | 2017.06.30 |
| [인공지능] Tensorflow 프로그래머 가이드부터 다시 시작하자. (0) | 2017.06.22 |
